



Table of contents
Most hat logo sizes range from 4-5 inches wide on the front panel, though the exact size varies with hat style, placement, and decoration method – embroidery, DTFlex, or all-over print. Get it wrong, and a design can become illegible when embroidered or look distorted when printed.
Here's how to size and place a logo for different hat types, plus the technical limits embroidery imposes that print doesn't.
Key takeaways
-
Hat logo size depends on the hat type. Structured caps support logos up to 4-5 inches wide, while beanies and dad hats need smaller, simpler marks.
-
Embroidery has strict technical requirements: a minimum letter height of 0.25 inches, a minimum line thickness of 0.05 inches, and a stitch count cap of around 15,000 stitches.
-
Front-center placement gives maximum visibility. Side and back placements suit subtler branding.
-
Printful supports embroidery, DTFlex, all-over print, and unlimited thread colors across a wide range of hat styles.
Hat logo sizes: Quick reference
Use this hat logo sizing chart as a starting point before diving into hat-specific details below. Exact logo dimensions, embroidery area, and print file size vary slightly by product – always check the product page for templates.
|
Hat type |
Logo area (front) |
Logo height |
Best placement |
|
Structured cap (baseball caps, snapbacks) |
4-5 inches wide |
Up to 2.25 inches |
Front center |
|
Trucker hat |
Up to 5 inches wide |
Up to 2 inches |
Front center |
|
Dad hat (unstructured) |
3.5-4 inches wide |
1.75-2 inches |
Front center |
|
Bucket hat |
~5 inches wide |
1.75-2 inches |
Front panel |
|
Beanie |
5 inches wide |
1.75-2 inches |
Front |
|
Side logos (any hat style) |
2-2.5 inches wide |
1-1.25 inches |
Side panel |
|
Back logos (any hat style) |
2.25-3 inches wide |
0.75-1 inch |
Back, above closure |


Recommended logo dimensions by hat type
Various hat structures hold logos differently. The stiffness of the front panel, the curve of the brim, and the fabric type all affect logo sizing – how large a design can be before it loses clarity.
Structured hats (classic baseball caps, snapbacks, trucker hats)
Structured baseball caps, snapbacks, and trucker hats all share the same stiff-panel advantage when it comes to logo size. Most baseball caps support a logo area of 4-5 inches wide, since the flat, reinforced panel holds detail well. Structured caps can support larger logos than unstructured styles – the buckram lining underneath keeps the fabric from puckering during embroidery.
Trucker hats with a flat brim follow similar sizing guidelines, accommodating logos up to 5 inches wide on the front foam panel. The mesh back panel is trickier for embroidery, so DTFlex often works better there because it doesn't require a solid fabric backing for stitching.
Unstructured hats (dad hats)
Dad hats and other low-profile options use a soft, unstructured crown – great for a relaxed look, but it limits how large a logo can go before the fabric curves distort the design. Dad hats have a maximum logo height of around 1.75-2 inches, with recommended widths of 3.5-4 inches for the front placement. Structured caps can support larger logos, but unstructured dad hats usually look better with smaller, simpler logo designs that won't warp as the fabric moves.
Bucket hats
A bucket hat offers a logo area of about 5 inches wide on the front panel – slightly more forgiving than a dad hat, since the brim doesn't compete with the same curve as a fitted crown. Bucket hats also support all-over print, letting a design wrap the outside, inside, or both panels rather than appearing as a single front logo. For a bold statement, all-over print is the way to go. For a clean brand mark, stick to the standard front logo area.
Beanies and knit hats
Beanies typically have a logo area of 5 inches wide by 1.75-2 inches tall, but the knit fabric stretches around a wearer's head, so a cozy beanie needs conservative sizing to avoid distortion once it's worn.
Minimum text height for beanies is 0.25 inches for lowercase letters and 0.3 inches for uppercase – anything smaller risks blurring into the knit texture. Knitted beanies also support all-over print for brands that want a full-coverage pattern instead of a single logo mark.
Placement strategies for maximum visibility

Where a logo sits on a hat changes how visible it is and how large it can practically be.
Front center – Maximum visibility
Front-center placement maximizes brand visibility on hats – it's often the first place people look and where a logo stands out most against the fabric. A standard logo size for front center placement is around 4 inches wide, though structured caps can push closer to 5 inches.
Keep the logo centered 0.5-1 inch above the curved brim, and make sure front logos don't run too close to the cap's edges – a small margin keeps the design from looking cramped against the seams.
A logo sized around 80-90% of the practical width usually looks more balanced than one stretched to the very edges of the available space.
Side embroidery and subtle branding
Side panel placement works well for keeping logos small and subtle – a wordmark, icon, or secondary mark that doesn't need to dominate the hat. Typical starting dimensions for side logos are 2-2.5 inches wide by 1-1.25 inches high. Because the side panel is narrower and curves more sharply than the front, side embroidery works best with minimalist designs rather than detailed ones.
Back placement and arch text
Back placements can feature slogans or secondary logos, often set just above the closure strap. For back logos above the closure, keep the height between 0.75 and 1 inch and the width between 2.25 and 3 inches. This placement suits arched text especially well, since the natural curve of the back panel mirrors the shape of curved lettering.
Common hat logo placement mistakes to avoid
Understanding hat logo size and placement together can prevent production headaches. A few mistakes come up again and again across hat styles – here’s how to avoid them.
-
Running the logo too close to the brim or edges. Front logos need breathing room – crowding the seams makes a design look unfinished. Instead, leave at least a small margin on every side and center the logo within the embroidery area rather than stretching it to the boundaries.
-
Using intricate designs on curved surfaces. Side seams and beanie fronts curve tightly, so an embroidered patch with small text or fine detail tends to distort there. Swap in simple logos for these placements, and save intricate artwork for flatter areas like the front panel of structured hats.
-
Ignoring minimum logo height for hats. Text under 0.2 inches tall for logos, or under 0.25 inches for embroidered lettering, often loses legibility once stitched. Always check the minimum size for your decoration method before finalizing a file, and bump up text height if a design falls below the threshold.
-
Oversizing for the hat's natural shape. A logo that looks great as a flat file can look stretched once it follows the curve of a structured shape or fitted crown. Preview the design on a mockup that follows the actual hat's contour, and scale down slightly for low-profile hats or curved front panels where distortion is more likely.
-
Packing too much detail into a small logo area. Side and back placements aren't the place for complex designs – save that level of detail for the larger front panel. For a baseball cap or similar structured hat, keep side and back marks to a single icon, initial, or short wordmark instead of a full logo.
Following a proper placement guide from the start – matching logo placement to the specific hat type and decoration method – saves far more time than fixing a distorted or oversized print after production. This applies whether you're preparing front embroidery for custom hats or a simple side mark for a low-profile cap.
Technical requirements for embroidered logos

Embroidery has stricter rules than print, since a design has to survive being converted into actual thread and stitches.
-
Minimum letter height for an embroidered logo is 0.25 inches. Below that, individual letters tend to merge or blur.
-
Minimum line thickness for embroidery is 0.05 inches. Lines thinner than this often drop out entirely during stitching.
-
The maximum stitch count for hat logos is typically around 15,000 stitches. That is a practical maximum for the design before it risks puckering the fabric or exceeding what the hat's structure can support.
-
Embroidery is generally limited to six thread colors per design, though some methods support unlimited thread colors for more complex color transitions.
-
Avoid ultra-thin lines or tiny text under 1/16 inch in size – anything finer than this rarely survives the digitizing and stitching process with clarity.
Because of these limits, hat embroidery designs should be simplified before digitizing. Fine gradients, thin serif fonts, and tiny logo elements typically need to be simplified, thickened, or removed entirely to hold up once stitched. If a logo design relies on fine details or photographic elements, DTFlex or all-over print can preserve them better than embroidery.
Best practices and tips for designing hat logos
A few principles apply to every custom hat logo, regardless of hat style or decoration method:
-
Favor bold shapes over fine detail. Simple, clean lines can make all the difference across embroidery, DTFlex, and print alike, especially at smaller logo sizes.
-
Design with the hat's natural shape in mind. A logo sitting on a curved front panel or wrapping a beanie should account for those fabric curves from the start, not just look good as a flat digital logo file.
-
Match complexity to placement. Save detailed logos for the largest front placements and keep side and back marks simple.
-
Keep the design recognizable at a glance. Strong brand recognition depends on a logo holding its shape and color even at that scale, not just on a screen.
-
Respect minimum logo size requirements. Text and fine elements need to clear the minimum thresholds above, or they risk becoming illegible once produced.
-
Test before scaling. A sample run can catch sizing, thread color, or placement issues before a logo design goes into full production across dozens of hats.
Remember, custom hats are fashion statements as much as functional headwear – design with how the logo looks in motion and from a distance in mind.
Put your logo design on any hat style with Printful
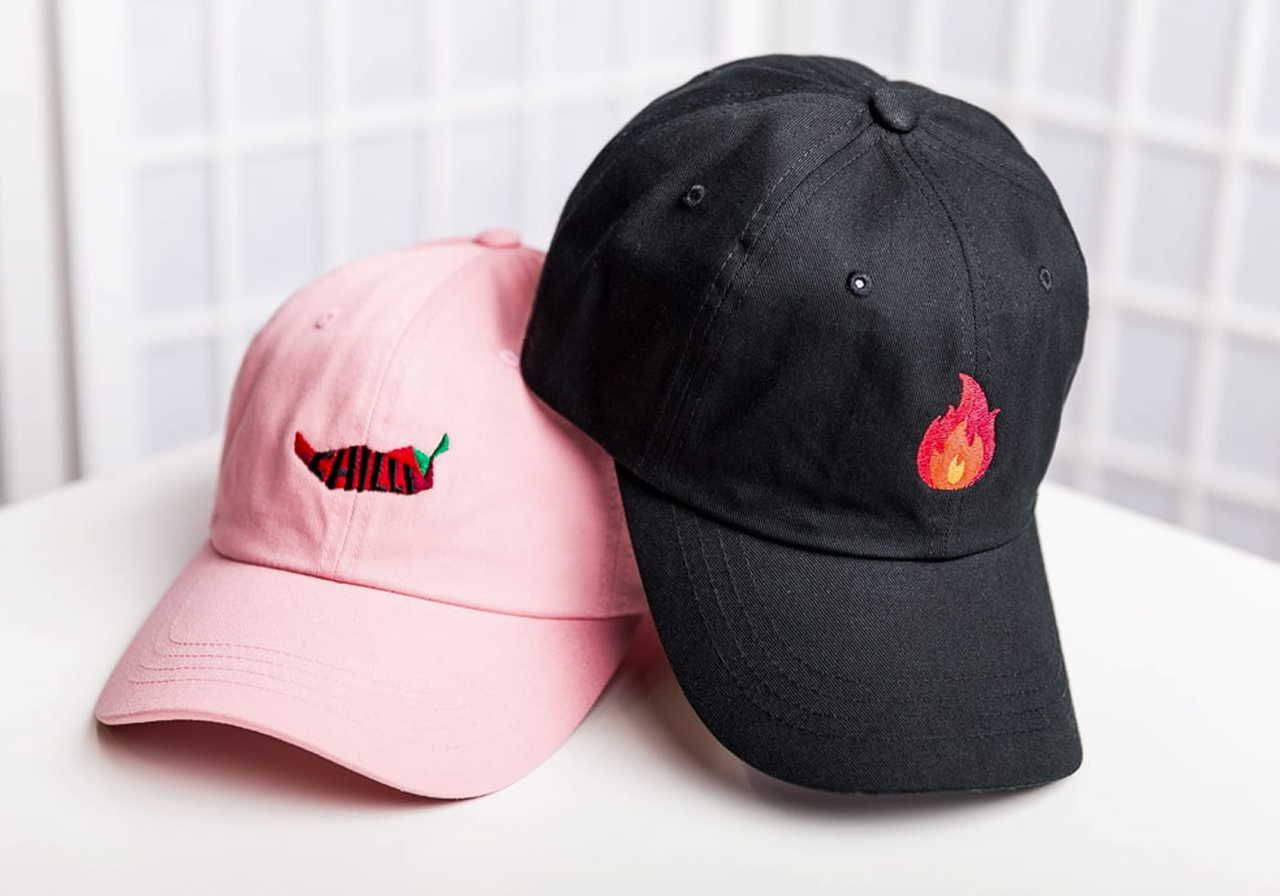
Printful supports embroidery, DTFlex, all-over print, and unlimited thread colors across a wide range of hat shapes – beanies, dad hats, baseball caps, snapbacks, trucker hats, 5-panel hats, mesh hats, bucket hats, and visors.
Each product page lists exact file guidelines – max embroidery area, print file size, and downloadable templates – for every placement and hat type, so you always know the right dimensions before uploading.
Ready to bring your detailed designs to life? Put your custom logo on beanies, trucker hats, or baseball caps with Printful's free tools, explore custom embroidery options, or browse hat embroidery ideas for inspiration first.


Hat logo size: FAQs
Standard embroidery size for hat front placements runs 4-5 inches wide on structured styles, with a maximum height of around 2.25 inches. Dad hats and beanies run slightly smaller, typically 3.5-4 inches wide. Side and back logos stay smaller, around 2-3 inches wide.
A DTFlex decal on the front of most hats works well between 4 and 5.5 inches wide, similar to embroidery sizing but with more flexibility for fine detail. Unlike embroidery, DTFlex handles gradients and complex designs well, so decals can carry more visual complexity at the same size.
It depends on whether it's a focal logo or a full pattern. A standard hat embroidery size for a front logo stays around 4-5 inches wide, while all-over print designs cover the entire panel or hat surface instead of a single placement.
The standard embroidery logo size for hats ranges from about 2-2.5 inches wide for side placements up to 4-5 inches wide for front placements, depending on hat type. Minimum letter height for embroidered text is 0.25 inches – anything smaller risks losing legibility once stitched.
Conclusion
Choosing the right hat logo size comes down to matching your design to the hat type, the placement, and the decoration method. Structured caps and trucker hats handle the boldest front logos, while beanies, dad hats, and side placements call for smaller, simplified designs. Whatever the hat style, respecting embroidery's technical requirements – minimum letter height, line thickness, and stitch count – helps keep the finished product sharp rather than blurry.
Ready to put your logo design on a hat? Design your own hat with Printful and bring your logo to life across embroidery, DTFlex, and all-over print.

By Baiba Blain
With 7+ years of experience in translation and creative writing, Baiba now leads a squad of talented writers, balancing research-backed storytelling with team guidance, quality assurance, and SEO processes. Outside of work, she enjoys exploring old castles, spontaneous road trips, and talking back to her cats. 10/10 arguments won so far.

