


Table of contents
Planning to launch custom-branded merch or create apparel for your next company event? Custom embroidered logos add a premium, professional touch that instantly elevates your gear.
However, creating artwork for thread isn't quite the same as designing for screen printing or the web. In this guide, we'll walk you through how to design a logo for embroidery, covering everything from choosing the right logo size and thread colors to picking the ideal file format for embroidery.
How to design a logo for embroidery
Partnering with a print-on-demand provider like Printful takes the hassle out of custom logo embroidery. Because stitching requires specialized setup, we handle the complex digitizing software and embroidery machines for you. All you need to do is prepare your artwork.
To get professional results, your embroidery files must follow specific formatting rules. Here are eight key points to remember before you upload your design.
Need to create your artwork first? Check out our guide on how to make custom embroidery designs.

Logo size and placement
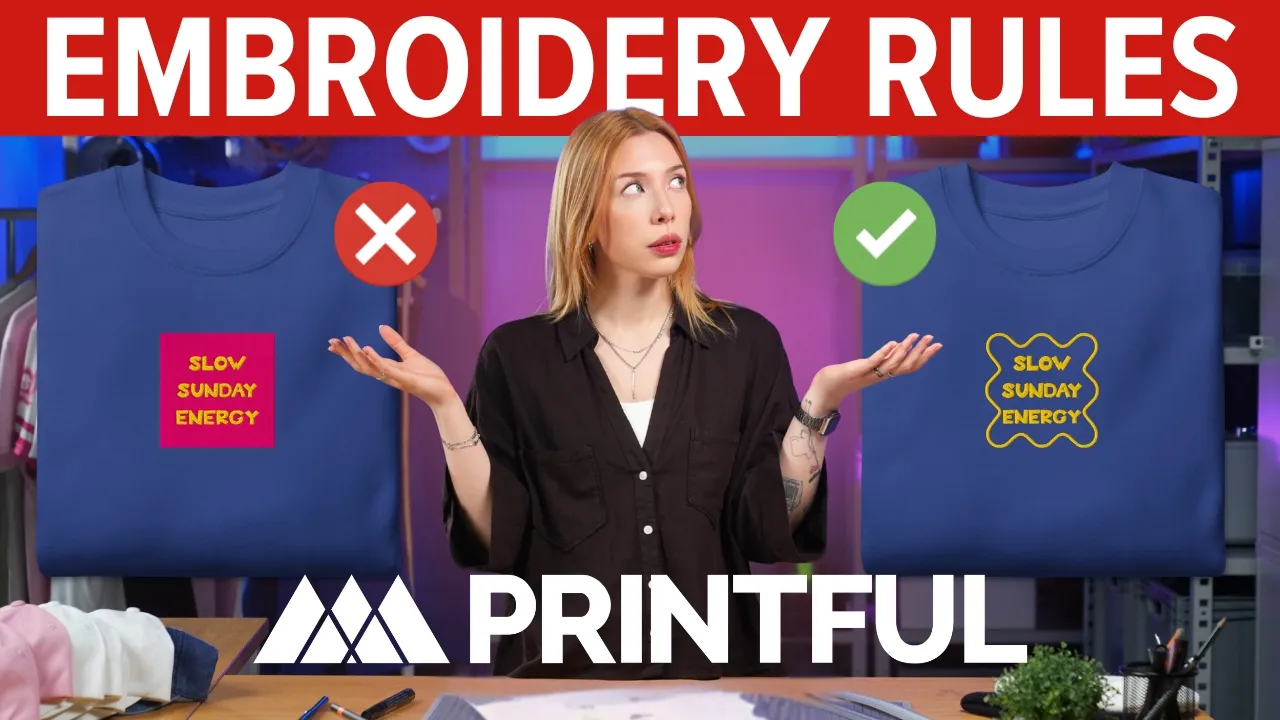
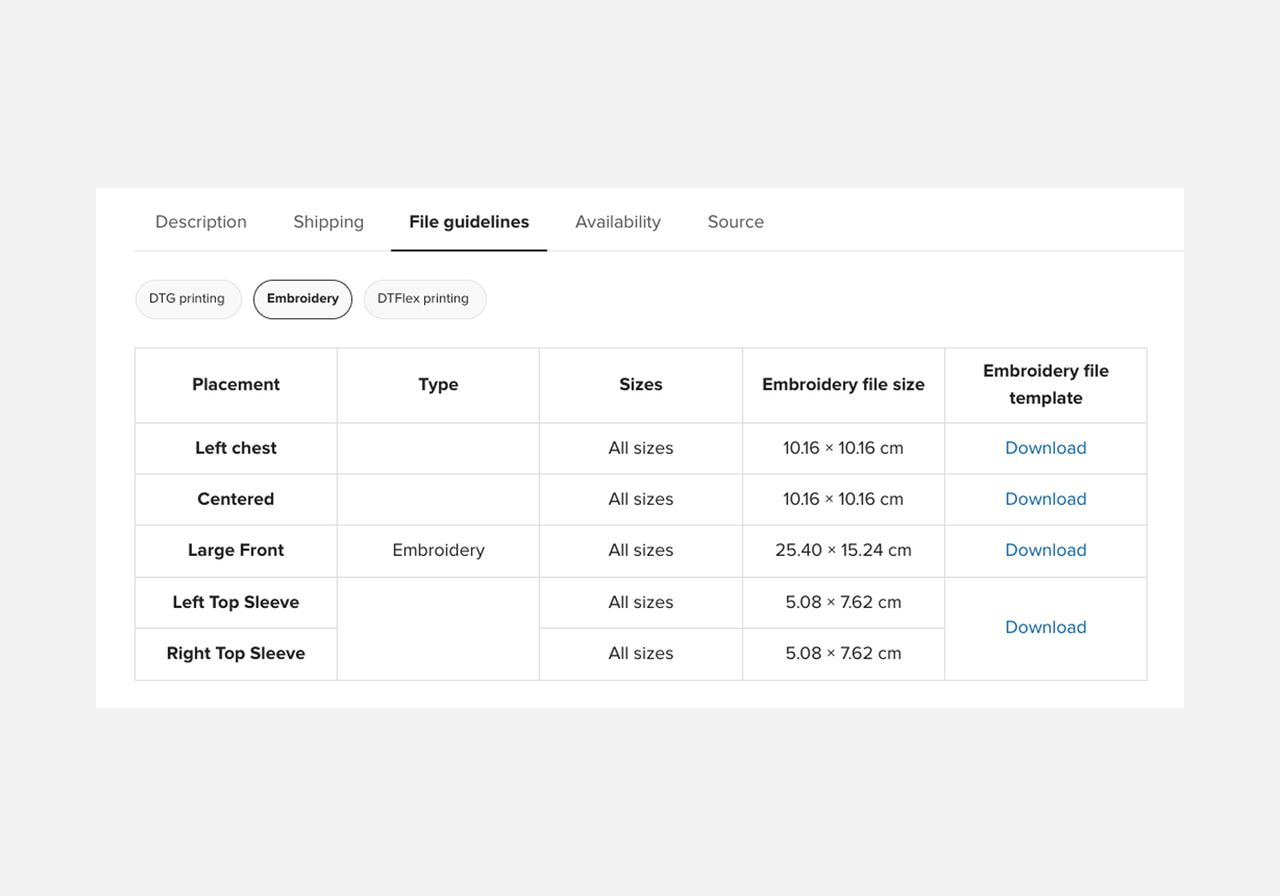
Embroidery print areas are typically smaller than standard printing, so your design needs to remain clear and legible at a modest size. Your maximum logo size depends on the specific product and placement you choose.
Some products, like the Cuffed Beanie, only have one available design placement. Other products, like caps or t-shirts, will offer more options. For example, the Unisex Staple T-Shirt has five available design placements for embroidery – left chest, center chest, large center, and left and right sleeve tops.
If you need maximum visibility, explore Printful’s dedicated large-embroidery collection to find products with larger print areas. Scaling your design to fit these exact placement zones helps prevent distortion and ensures your logo looks clean and professional on every piece.
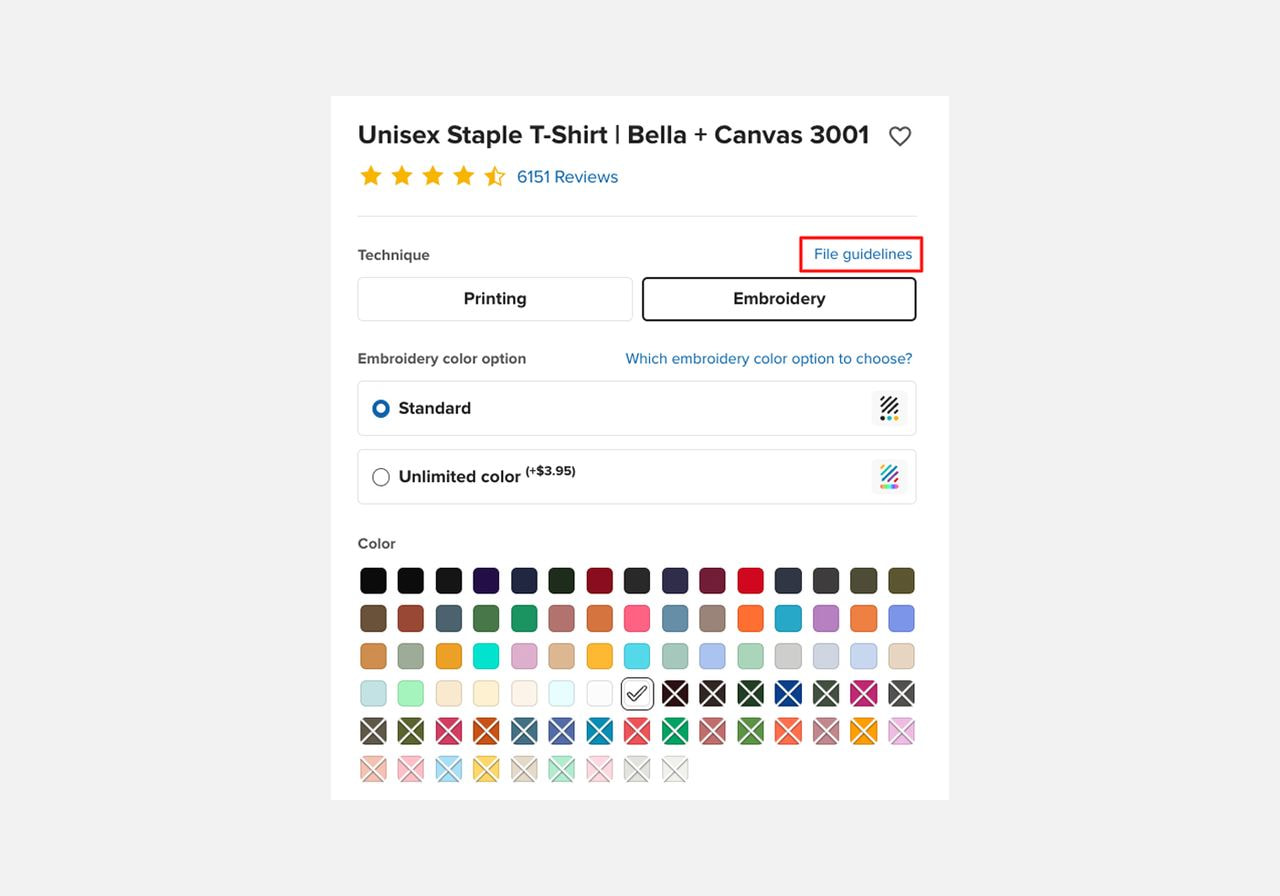
To get the exact sizing for your project, head to your chosen product page in the Printful Catalog and select File guidelines on the right-hand side. These guidelines outline the recommended sizing, fonts, colors, and more based on your chosen placement.
Logo file requirements
Preparing your print file to match exact specifications ensures your logo looks sharp once stitched. Pay attention to three core requirements: finding the right logo format for embroidery, maintaining resolution, and understanding digitization.
PDF and PNG are the best choices for embroidered logos. PDF format can preserve vector graphics, letting your design scale cleanly without losing edge quality, while PNG format works far better for raster graphics. JPGs don't support transparent backgrounds, which inflates stitch count and blurs detail.
To get crisp lines and clean edges on fabric, your design file must be set to 300 DPI (dots per inch). Lower resolutions can result in blurry edges that don't translate well into stitches, while files above 300 DPI simply increase file size without improving quality. Upload a high-resolution PNG or PDF set to 300 DPI for optimal results.
Before an embroidery machine can stitch your artwork, your design file must be converted into a digitized format that tells the machine where to place every stitch. Printful handles this conversion using digitizing software tailored to our embroidery machines.
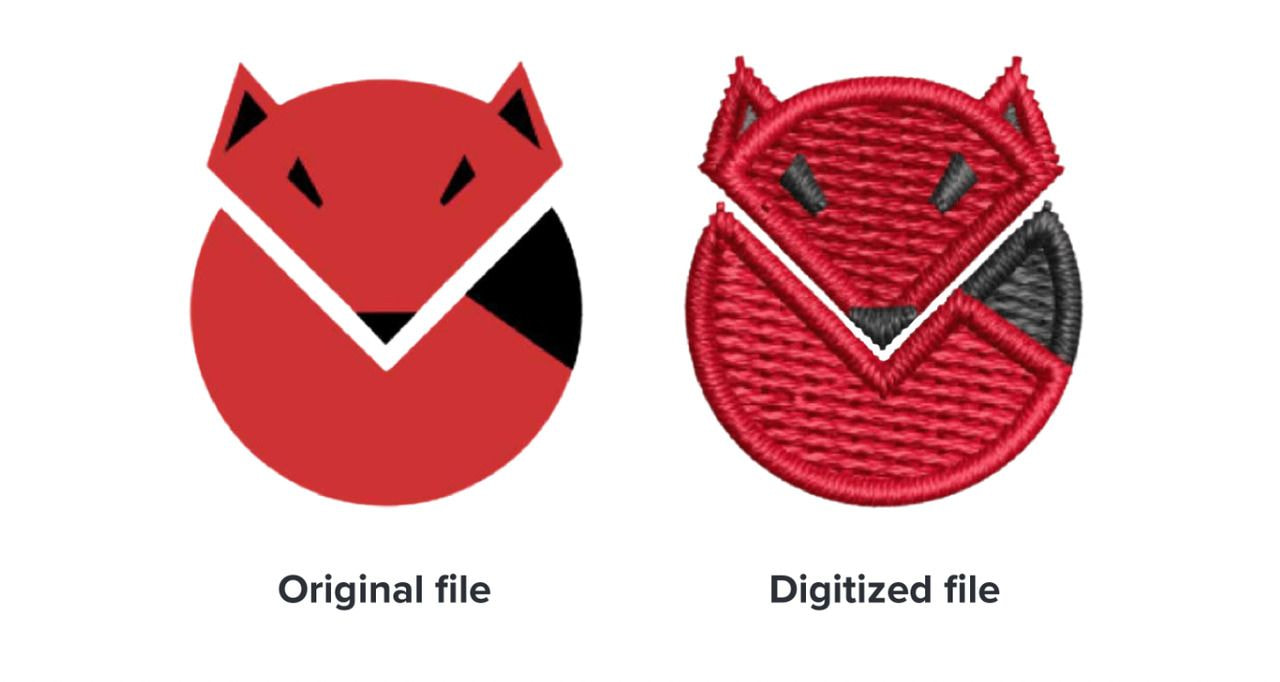
Digitization determines variables like stitch direction and stitch density. Because machine paths vary, digitizing the exact same artwork twice can produce slightly different results.
Printful charges a one-time digitization fee per new design based on the placement:
-
Standard design digitization: $6.50
-
Text-only design digitization: $3.95
-
Back and side placement digitization: $2.95
-
Design adjustment fee: $2.95
Once digitized, you can reuse the file for future orders of the same design without paying the fee again.
Read more: 10 Things you didn’t know Printful’s Design Maker could do
Logo color options
Thread color selection works differently than standard printing. Printful offers two ways to handle your design colors: standard embroidery and unlimited color embroidery.
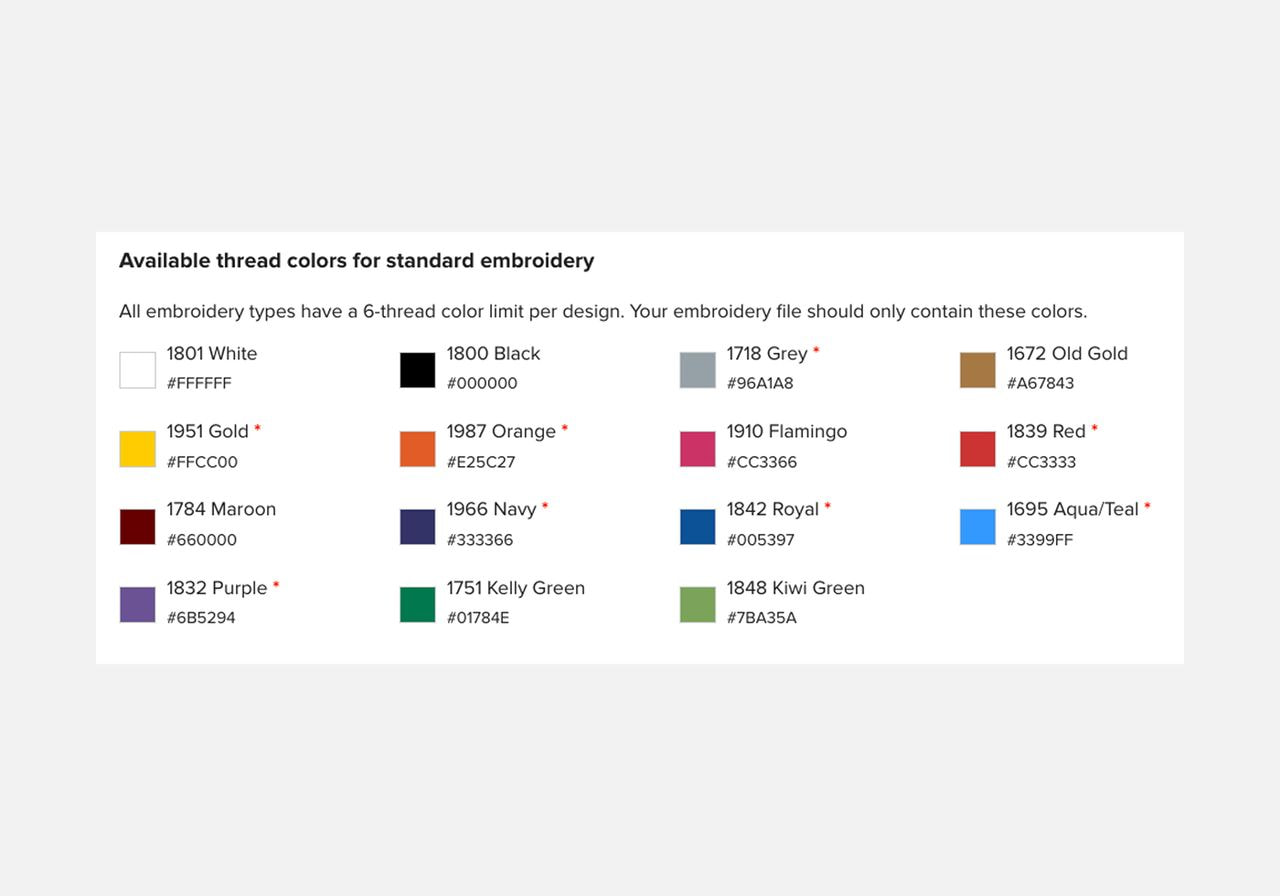
Most embroidered apparel relies on a set palette of physical threads. Printful provides a curated selection of 15 thread colors, with up to six solid colors available per placement.
Because embroidery machines use a fixed set of threads at a time, standard embroidery only supports solid colors. If your logo design features clean lines and direct color blocks, standard embroidery will give you a sharp finish even with fewer colors.
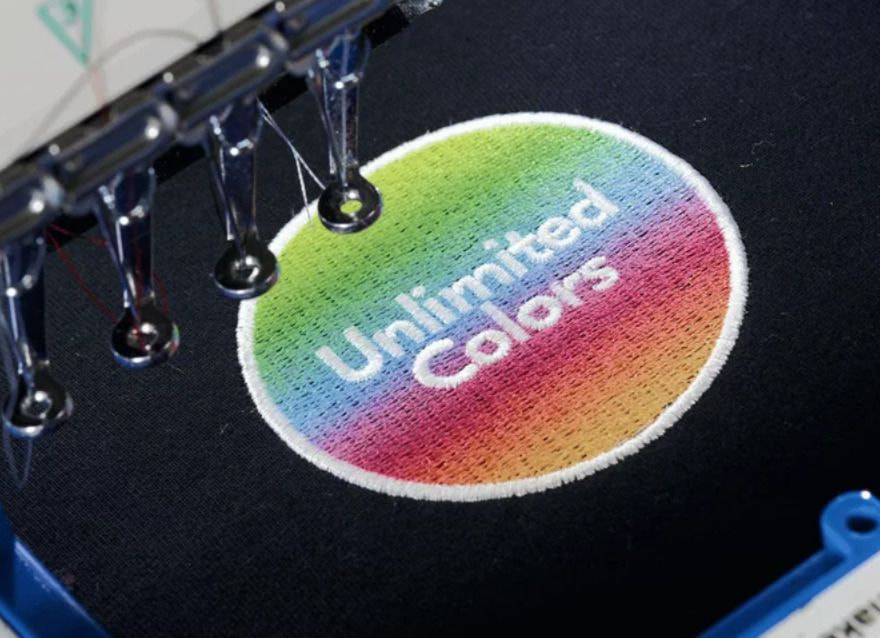
If your logo requires gradients, shading, or a broader range of colors, Printful also offers unlimited color embroidery. This advanced technique uses a single white thread that is continuously colored by the machine during the stitching process. While this technique comes with an additional fee, it gives you greater color flexibility without the restrictions of physical thread counts.
Level of detail
Embroidery can’t match the precise detail of direct-to-garment (DTG) or sublimation printing because it uses physical embroidery thread instead of ink or dye. Complex designs with tight lines or small design elements may need to be simplified to stitch cleanly on fabric.
To ensure your logo looks sharp on real apparel, keep your design simple and keep these limits in mind:
-
Text and fonts: Small text can easily become unreadable once stitched. Keep lettering at least 0.25” tall and 0.05” thick. Avoid delicate script fonts or fine lines that bleed together.
-
Line thickness: Lines thinner than the minimum thickness of 0.05” force the machine to use a single run stitch, which can make details look thin or uneven.
-
Textures and distress: Subtle patterns, distressed textures, and gradients do not translate into thread. Digitizing software converts these areas into simpler embroidery, which can strip away textured effects and eliminate small elements.
-
Photographs: Embroidery machines can’t replicate photograph details. Convert photos into bold, simplified shapes before adding them to embroidered logos.
Here are some poor examples to avoid:


Types of stitches
Printful’s embroidery machines use four core stitch types, plus a specialized puff technique to build your logo. Understanding how these stitch options work can help you choose the right style for your artwork.
Flat embroidery is the foundational technique, using clean, decorative stitches across a flat surface. It provides a sleek finish on thicker fabrics and works especially well for classic embroidered logos.
To cover large solid areas, the Tatami fill stitch uses short, dense, straight stitches packed closely together. This creates full color coverage across wider shapes and pairs well with edge-defining stitch styles.
Satin stitches deliver a smooth, glossy finish without gaps or uneven edges. In machine embroidery, this style works best for outlining objects, framing curved shapes, or handling linear details alongside fill stitching.
For small design elements and fine details, the run stitch uses a simple series of straight, continuous stitches. It’s the gentlest option for delicate materials, making it suitable for subtle embellishments and tight accents without pulling or warping thin fabrics.
Beyond standard flat stitching, 3D puff embroidery adds physical depth by placing a foam underlay beneath your design. The machine stitches directly over the shaped foam, creating a raised, tactile effect that looks best on structured, heavy fabric items like caps.
Because 3D puff requires extra preparation and machine time, the digitizing and production processes take slightly longer than standard flat embroidery.
Read more: Step-by-step guide to embroidery designs
Fonts
Bold, simple fonts tend to translate best into thread. Avoid small, delicate fonts or intricate script fonts when designing embroidered logos. When text is too small, digitizing software converts the letters into a simple run stitch, which often makes the wording unreadable on fabric.
Standard, highly legible sans-serif fonts like Arial, Helvetica, and Myriad Pro deliver crisp lines and clean edges. Keep your font size above 36 pt and your text height above 0.25″ to ensure your logo stays crisp and legible once stitched.

Valuable read: 26 Best fonts for embroidery designs
Gradients
Printful's unlimited color embroidery allows smooth color transitions on select products. If you don't use this option, avoid gradients entirely and stick to solid color blocks.

Source: Printful
For unlimited color embroidery, gradient elements must be at least 0.8” wide so the machine has enough space to create smooth color transitions. Smaller elements force digitizing software to use solid colors or run stitches, which can disrupt your design.
Unlimited color embroidery uses the same standard digitization fees as standard embroidery.
Fabric type
Matching your logo to the right fabric type is just as important as setting up your print file. Heavyweight materials like cotton twill, canvas bags, and structured hats hold stitches firmly and support complex embroidered logos.
If you’re using delicate fabrics, high stitch counts can cause puckering when pulled in an embroidery hoop. For specialized materials like faux leather, stick to lower stitch density and clean outer lines so the needle doesn't damage the surface.
Always check product specs in Printful’s Catalog to make sure your garment choice matches your design's complexity.
Care tip for your customers:
Embroidered designs offer excellent durability, but improper washing can damage the thread. Remind buyers to wash garments inside out on a gentle cycle and avoid harsh chemicals like bleach or strong spot treatments, as they weaken stitch fibers and cause vibrant thread colors to fade over time.
Designing a logo with Printful Design Maker
Now that you know the embroidery file requirements, color rules, and stitch types, you can create your logo design and add it to a product. Here’s how to design a logo for embroidery using Printful’s Design Maker.
1. Pick your product
Log in to your Printful Dashboard, open the Product Catalog, and filter the results by Technique for embroidery-ready items. Select the one you want to customize and hit Start designing.
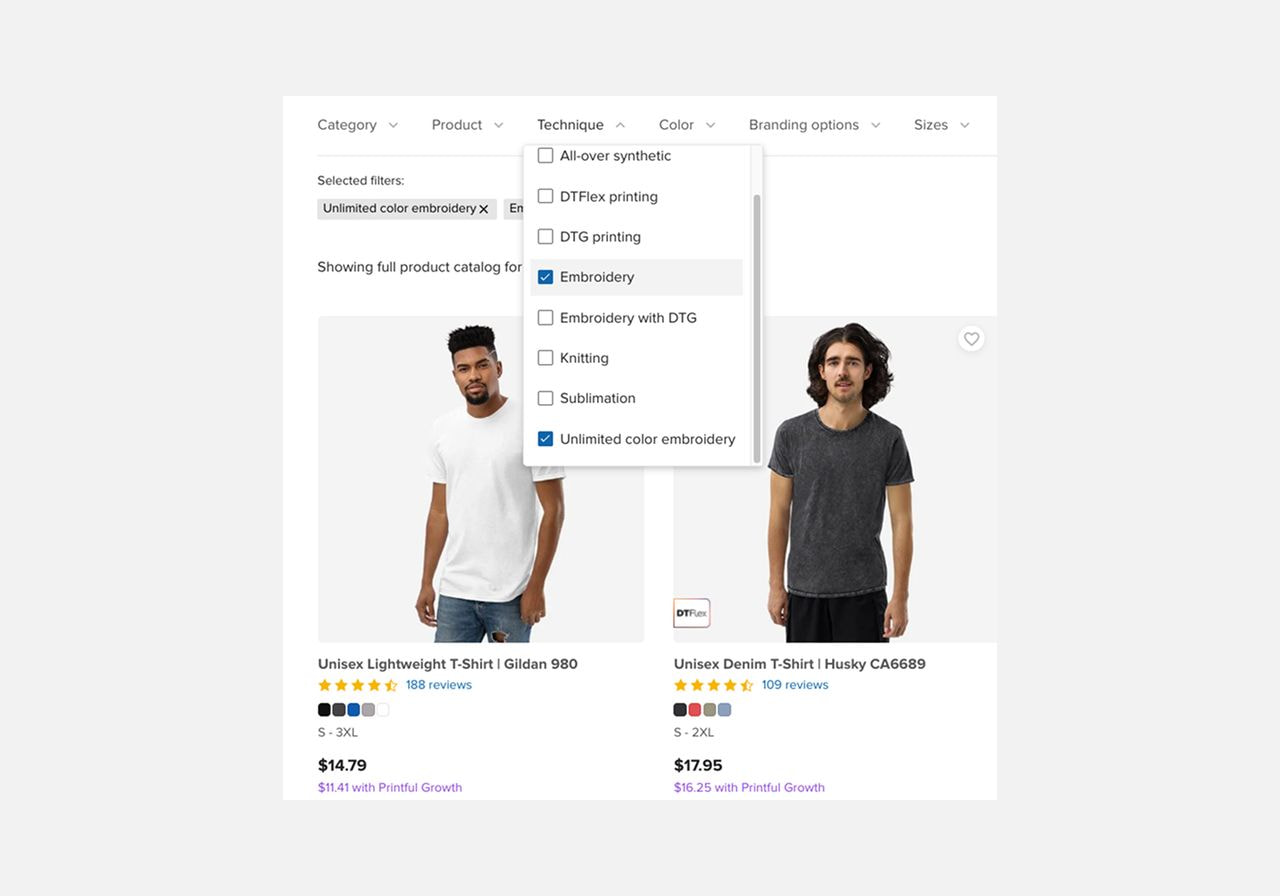
If you aren't sure which item to customize, check out our favorite embroidery ideas to see what works best on different garments.
2. Add your logo design
Select the placement for your logo within the Design Maker. Open the Uploads tab in the left side menu to upload your high-resolution PNG or PDF design file. Don't have a logo design yet? Browse graphic assets in Clipart or Quick Designs for pre-made designs.
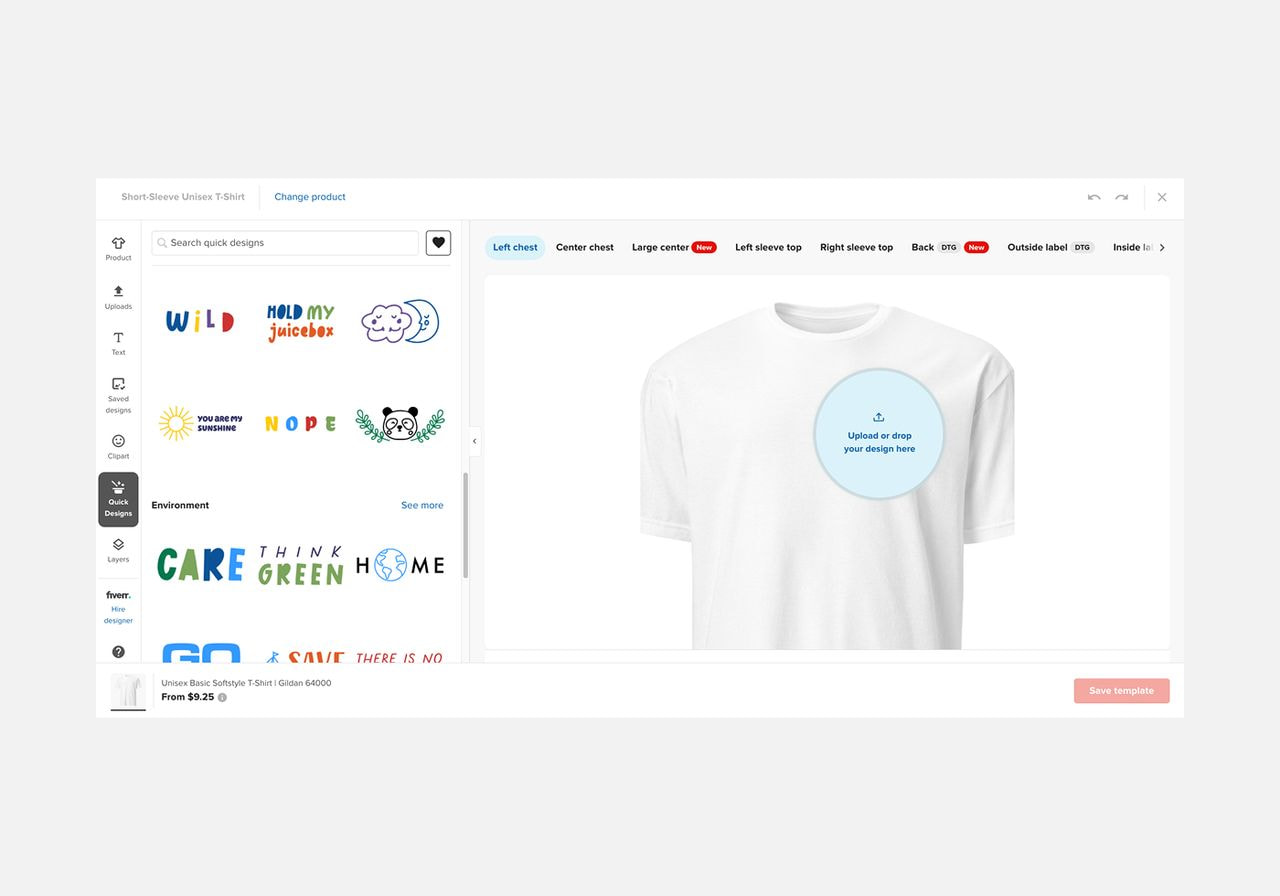
You'll see an instant preview of your item, where you can select thread colors, adjust sizing, and position your design within the designated embroidery area.
3. Save the template
Click Save template once your design looks right. You can view, edit, or adjust your saved designs anytime from the My products tab in your Printful dashboard. When you're ready to sell, add the item directly to your online store from this tab.
Did you know?
You can check thread color accuracy and item quality before selling by placing a sample order. Printful accounts start with one sample order per month (up to three items per order) at a 20% discount on almost any product in the Catalog. As your monthly sales grow, your sample allowance grows with them.
From logo design to custom embroidered product
Custom embroidery gives your products a premium finish that lasts. By using the right file settings, keeping your logo simple, and following thread and line thickness guidelines, you’ll help ensure your embroidered logos have clean, high-quality stitching.
Ready to start creating? Learn more about creating embroidery files or explore custom embroidery trends for inspiration for your next design. When your artwork is ready, sign up for Printful. Whether you want to make your own t-shirt or launch a full merch line, we'll handle the fulfillment.
Read next:
FAQ
To turn a logo into embroidery, you need to convert your design into a digitized file format that embroidery machines can read. Upload a high-resolution PNG format or PDF design set to 300 DPI, follow embroidery size and detail guidelines, and use a digitizing tool or service like Printful to prepare your file for stitching.
To create clean embroidered logos, scale up small text, remove fine lines, and stick to solid color palettes. Adjust your overall design size to ensure every element meets minimum thickness requirements, as tiny details and complex color gradients don't translate cleanly into thread.
PDF format is the best choice for vector graphics because it lets you scale your embroidery logo cleanly without losing edge clarity. For raster graphics, high-resolution PNG format set to 300 DPI works best to preserve crisp lines. Avoid JPG format since its lack of transparency can increase stitch count and create blurry edges.
Popular tools like Adobe Illustrator and Photoshop are useful for designing vector graphics and raster artwork for embroidered logos, while software like Wilcom or Hatch handles manual digitizing. If you prefer an all-in-one option, Printful’s Design Maker lets you upload artwork, automatically convert designs for embroidery, and publish products straight to your store.

Jordana is a content writer with over 6 years of experience in content writing and technical writing. Her not-so-secret passion is breaking down complex ideas into clear, straightforward content, whether it's explaining tech concepts or crafting stories that connect. When she's not writing, you'll find her enjoying good sushi or falling down movie trivia rabbit holes.

