


Table of contents
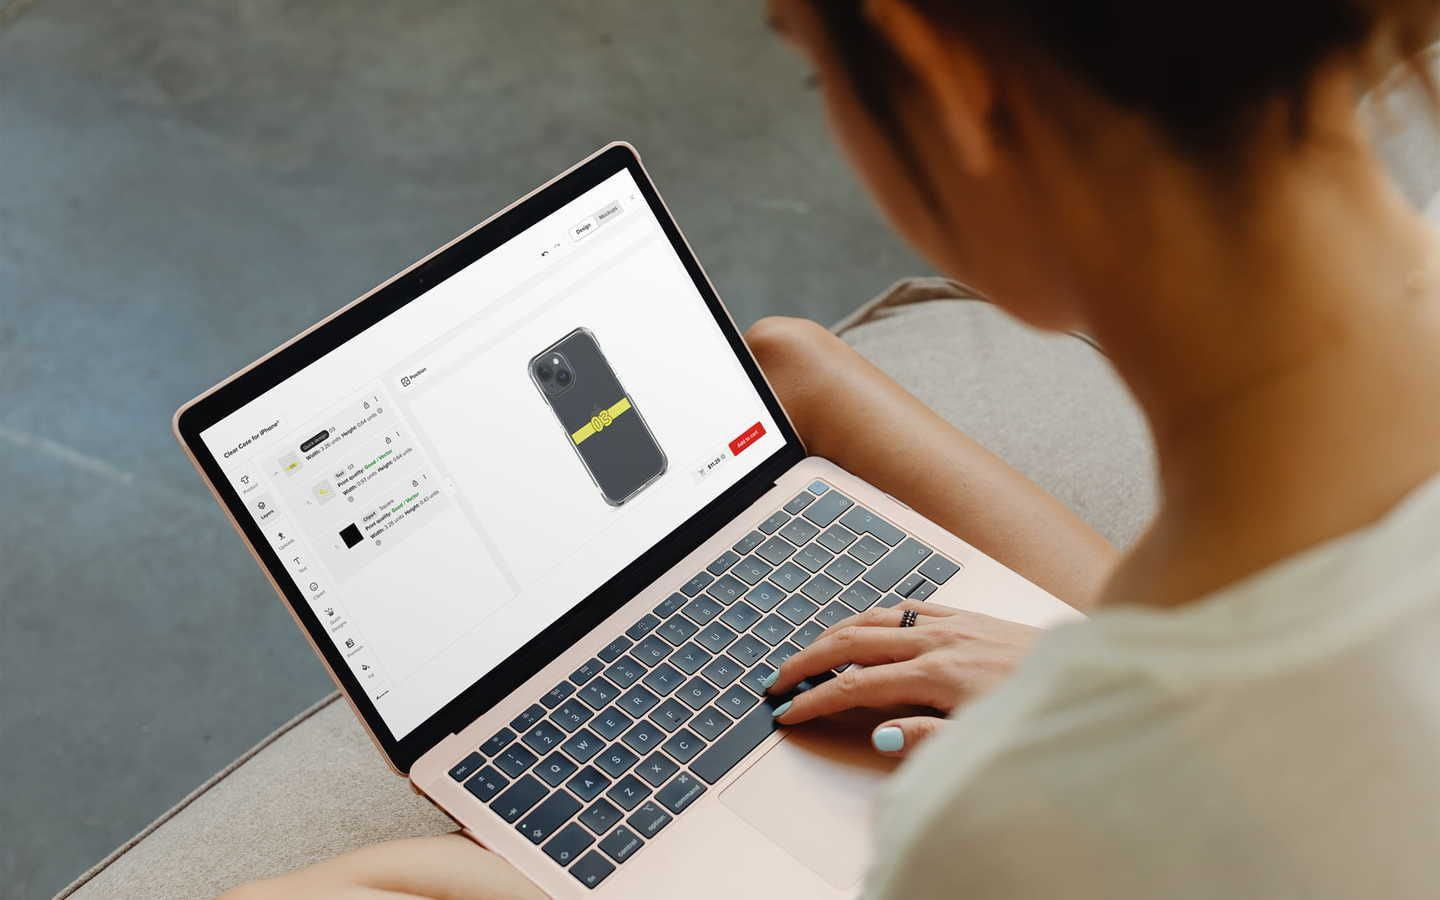
The Printful Design Maker is a browser-based design tool for creating custom products without external software. It includes features for typography, image editing, and pattern generation.
Using these features correctly ensures the designs on your print products are eye-catching, professional, and something every shopper wants to buy. This guide explains how to use each tool to create and manage your product designs effectively.


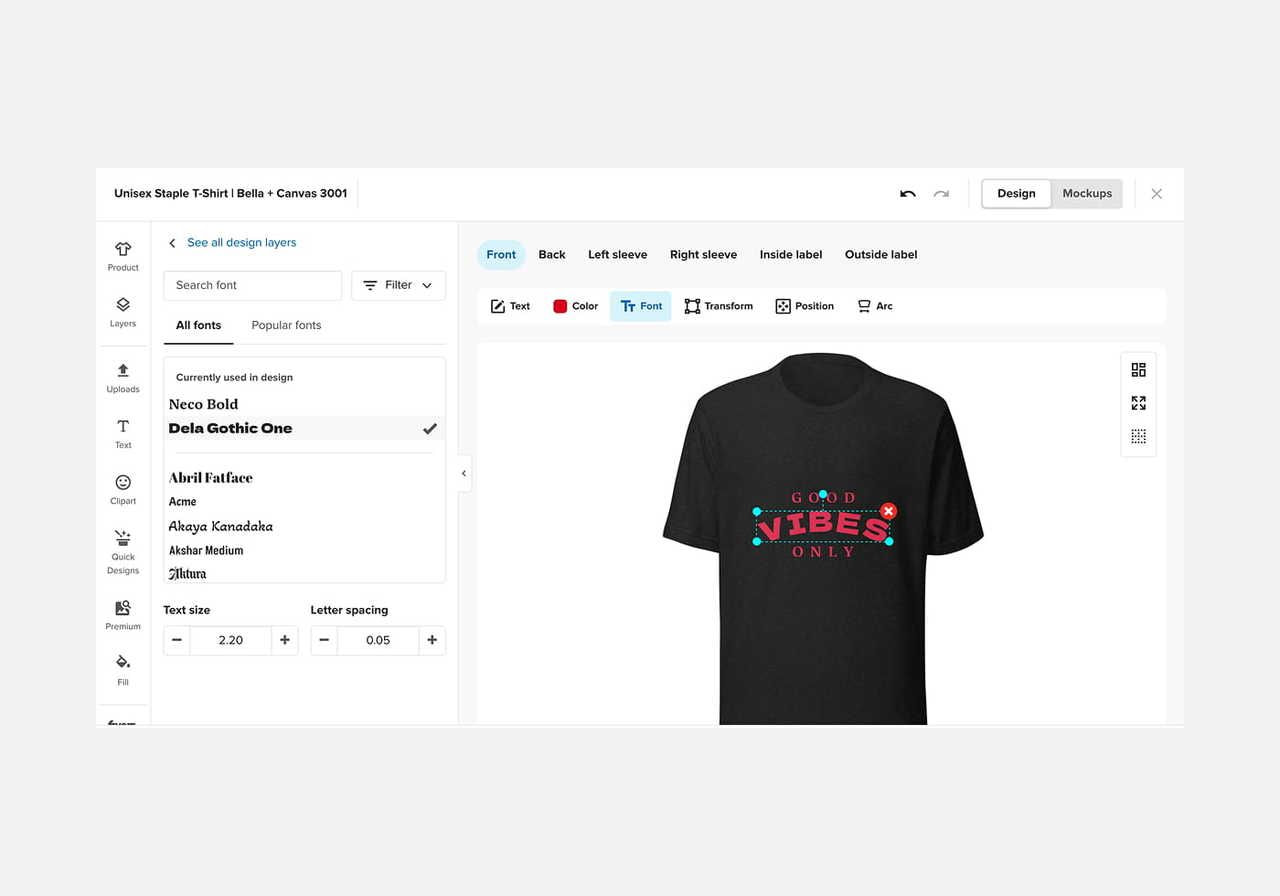
1. Text editor
The Text Tool lets you create designs with built-in fonts optimized for several customization techniques. This is the primary method for adding messages to clothing, like custom t-shirts or custom hoodies.
Direct-to-garment (DTG) printing:
-
Pick a font and choose the size and color.
-
Adjust letter spacing.
-
Add an outline or shadow.
-
Adjust the text arc.
Embroidery:
-
Select a font and size.
-
Adjust letter spacing.
-
Choose the thread color.
-
Set the line height.
If you have a specific brand font, save it as a file and upload it to the Design Maker. For embroidery, Printful must convert your file into a format the machines can read. This embroidery digitization process requires a one-time fee. For text designs, the fee is $3.95 per file, while most other product designs cost $6.50 per file.
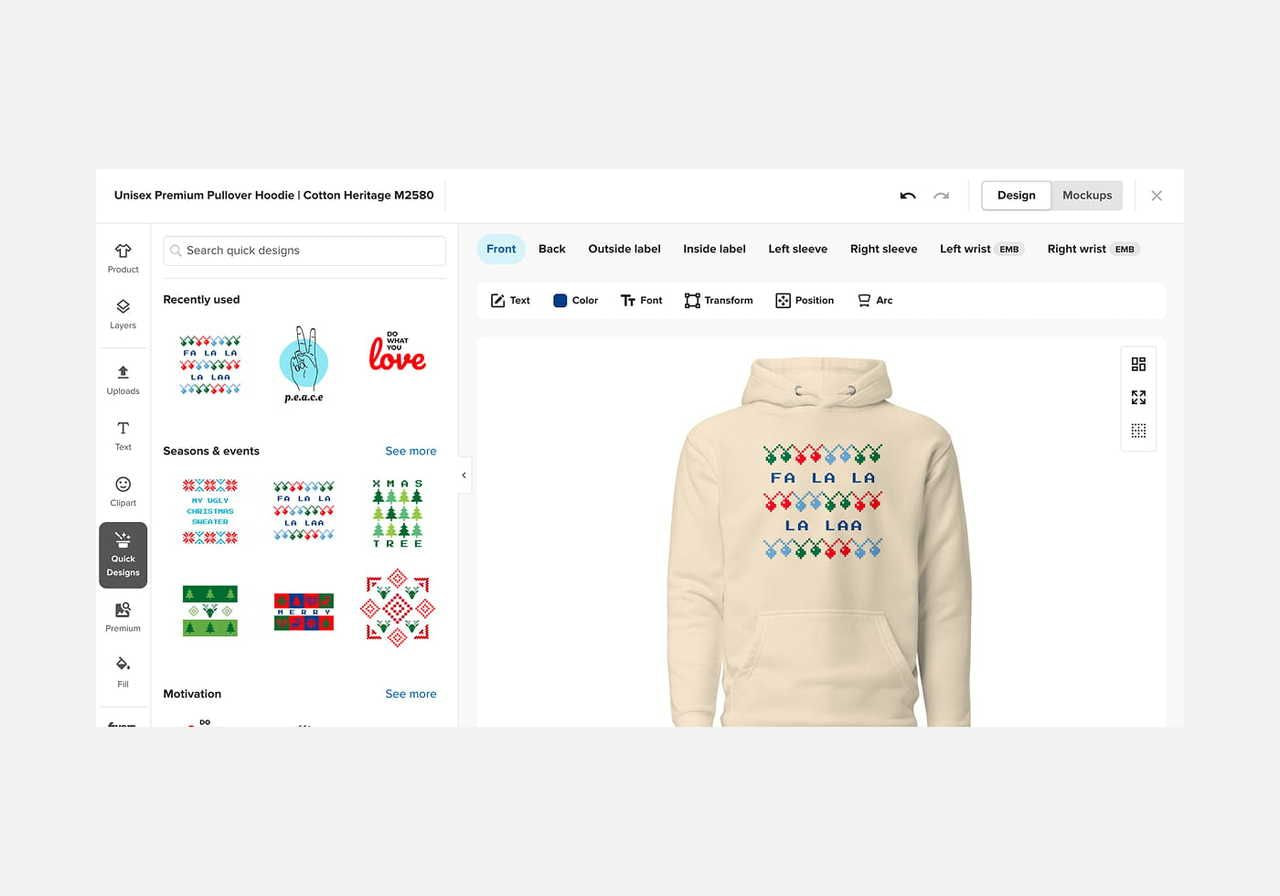
2. Clipart and Quick Designs
The design maker includes over 50 clipart collections and nearly 3,000 individual graphics available for free. Explore the Clipart tab for minimalist elements or seasonal graphics to customize products quickly.
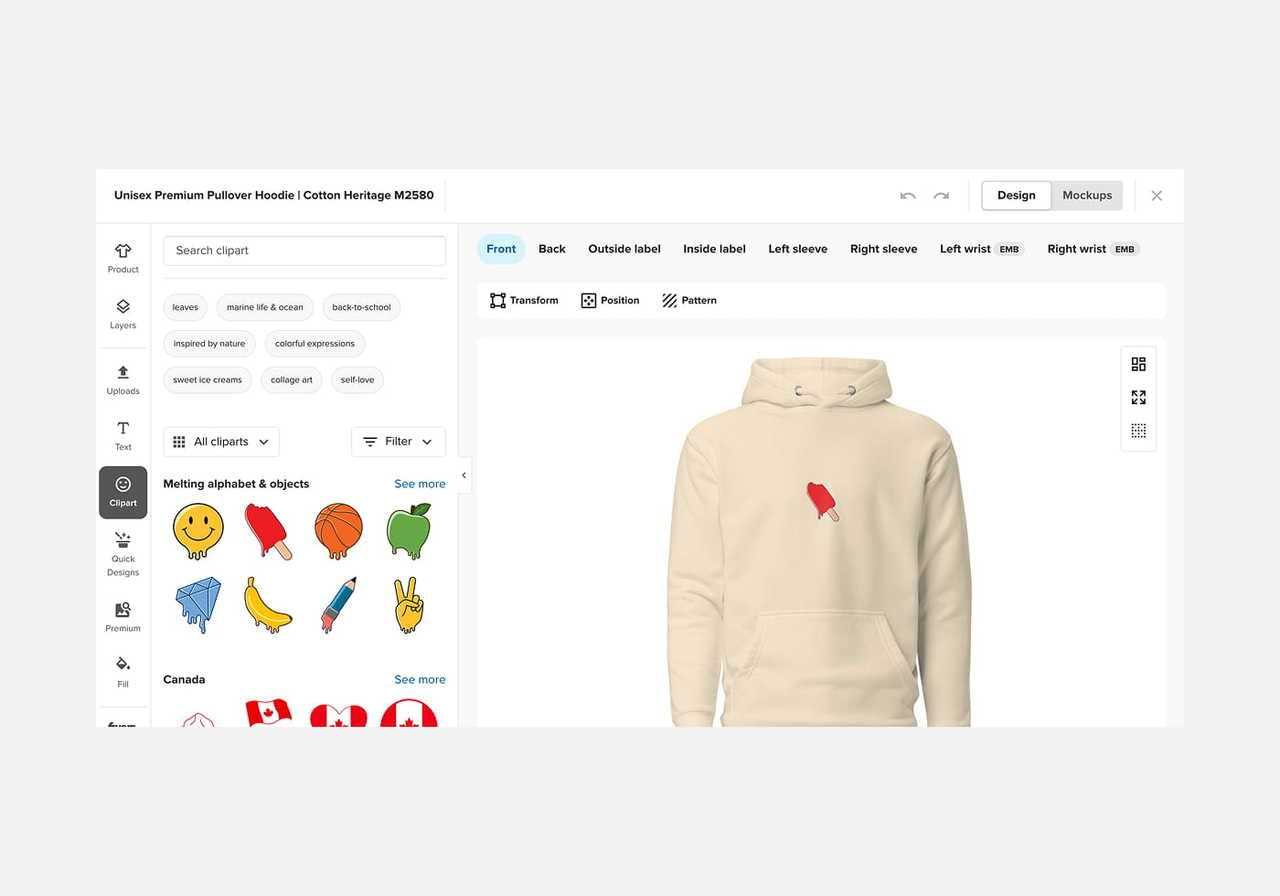
If you need a professional composition without starting from scratch, Quick Designs are the solution. These are pre-made combinations of text and clipart. Adjust them by dragging several onto the product to create layers, changing colors, and deleting elements you don't want.
To access these, click Quick Designs on the left side of the Design Maker menu.
3. Design placement adjustment
Precise design placement guarantees your print products meet professional standards. Click on any element to see customization options at the top of the window.
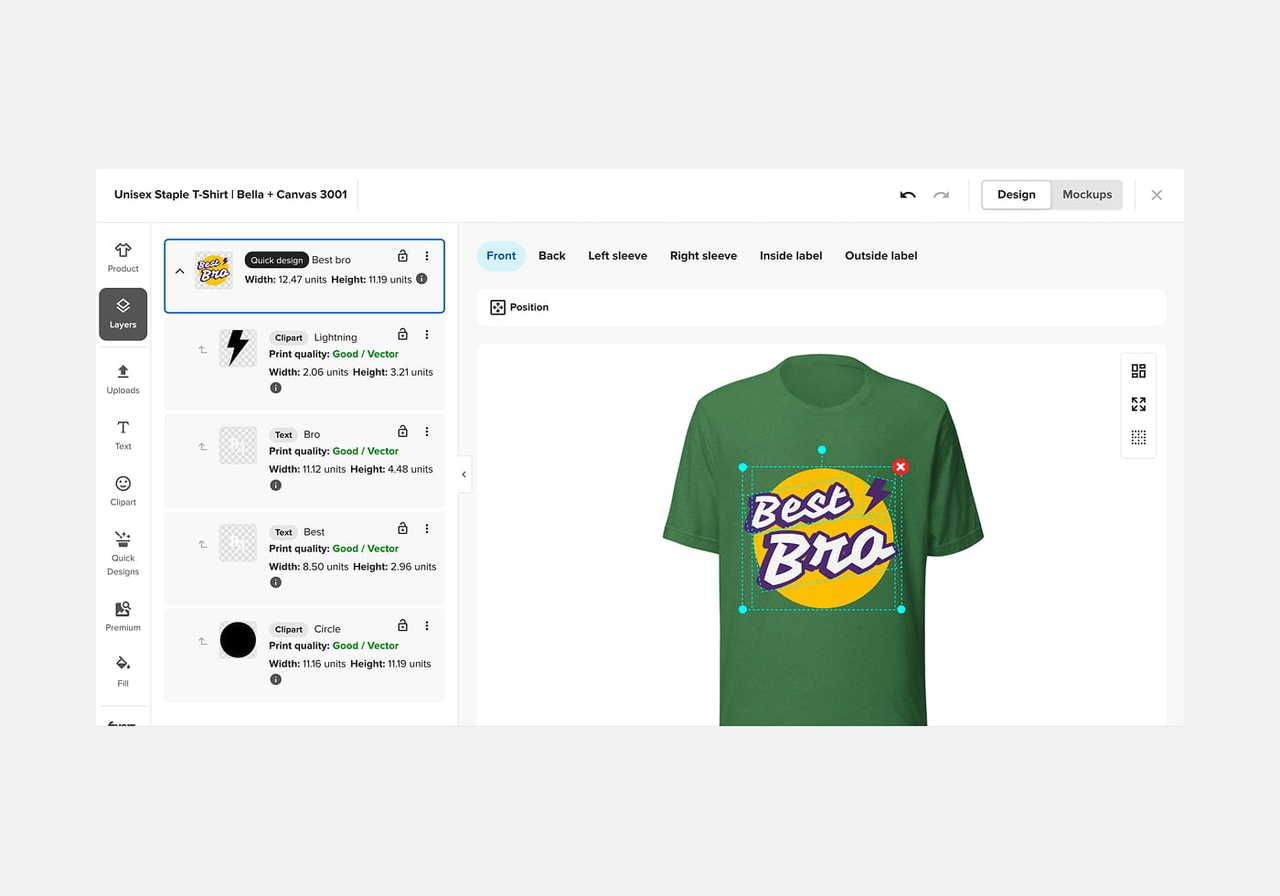
How to make adjustments:
-
Use the buttons on the left to align, flip, or rotate.
-
Crop the design for a better fit.
-
Type a specific number in the rotation box for precision.
-
Use the blue anchor points to scale the graphic.
You can also manually change your design’s size by altering its width and height under the Layers section.
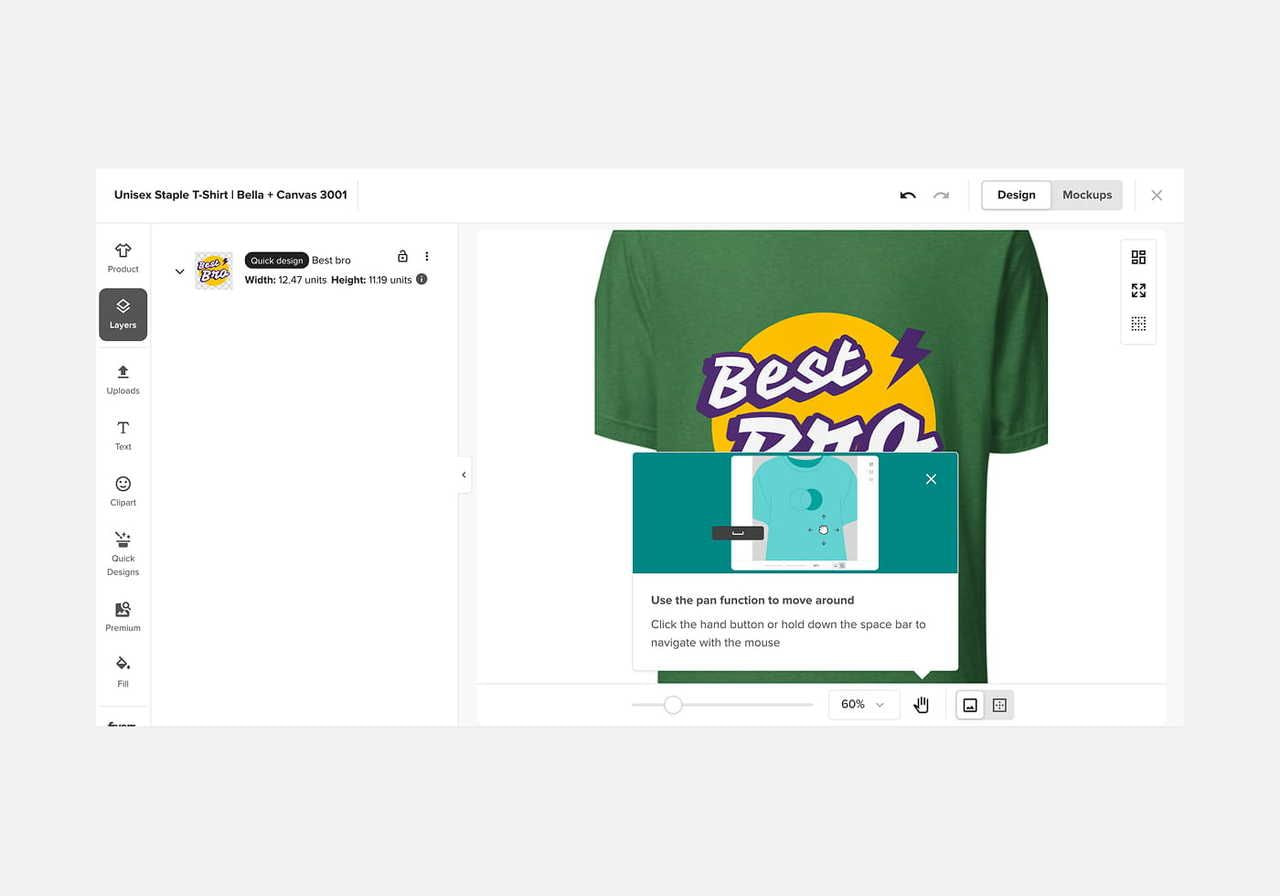
To adjust the design placement with more precision, use the zoom tool. This feature works for all clothing products except all-over-print items. Click Zoom in the toolbar on the top right. Adjust your design, and click Zoom again.
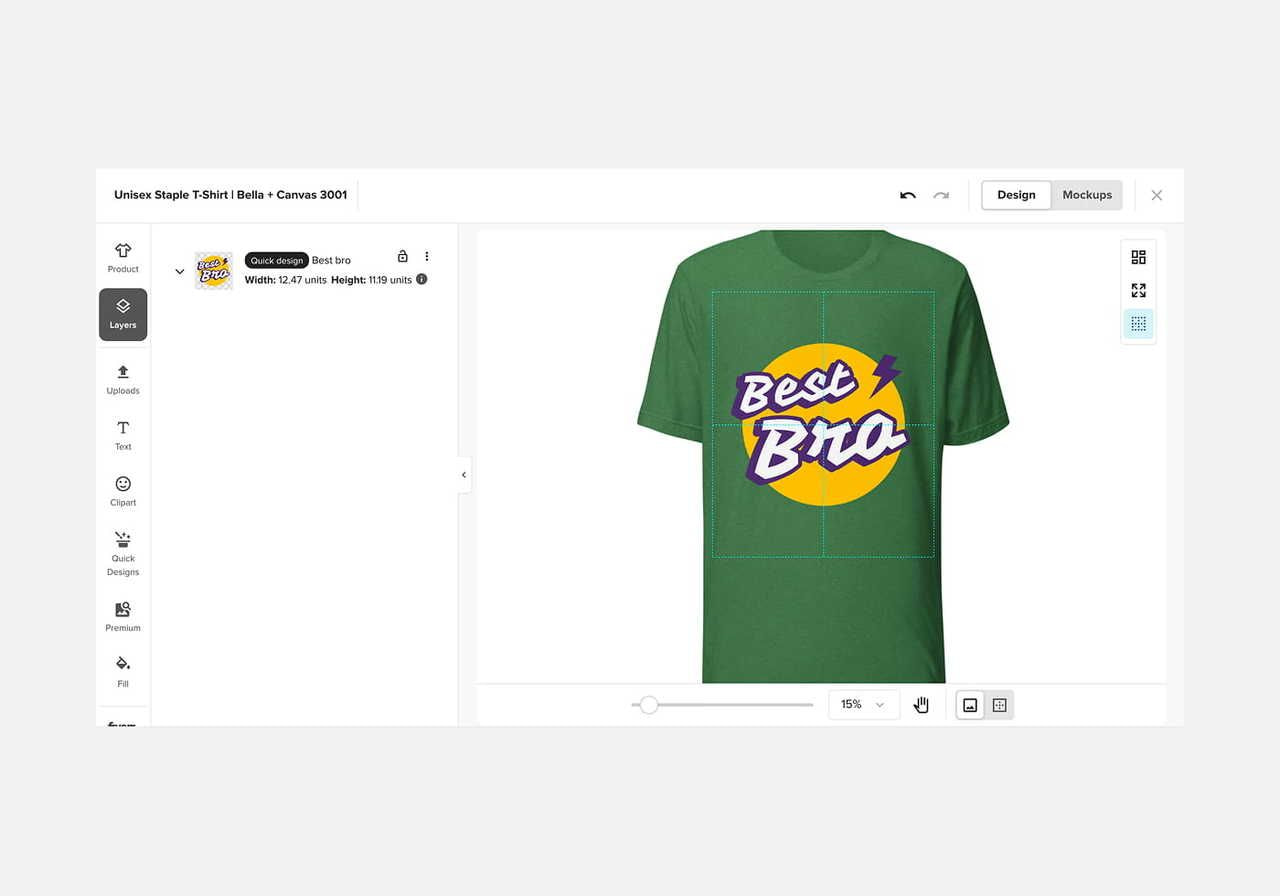
To keep your artwork within the safe print area and prevent the design from being cut off during printing, click the Grid icon to make the print area boundaries visible.
4. Design layering
The Design Maker lets you stack multiple elements to build complex, multi-dimensional artwork. You can mix your uploaded files with Printful assets, such as clipart or text.
Use the Layers section to drag and rearrange elements, ensuring the most important parts of your design are visible and layered correctly.

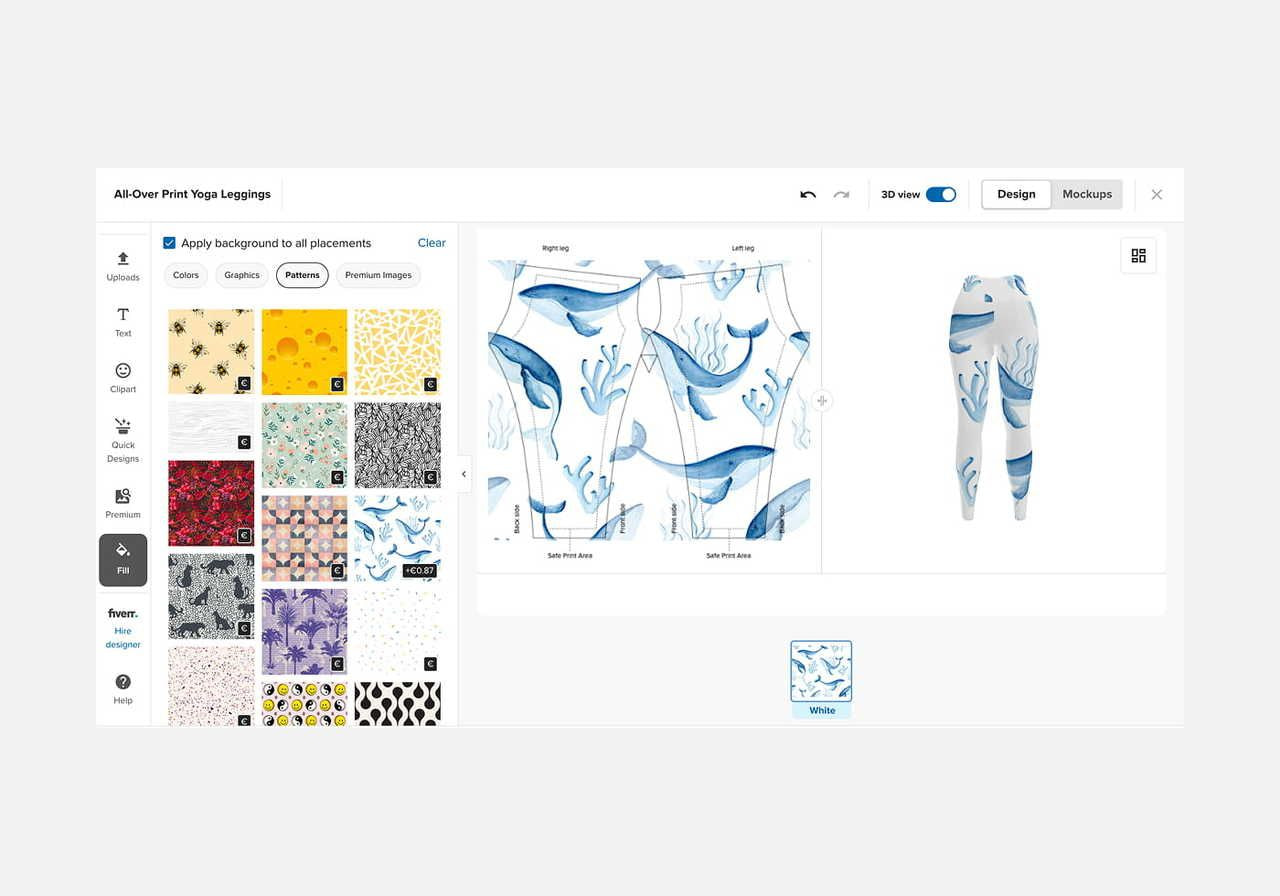
5. Background colors and graphics
Apply background colors or graphics directly within the Design Maker to prepare custom products for your online store. This feature is available for mugs, phone cases, and all-over-print items like leggings. Using these built-in backgrounds saves time that would otherwise be spent creating them with external design software.
6. Background remover
If you have an image with an unwanted background, use the background removal tool. This works on both uploaded files and graphics selected from the Getty Images premium image library.
Upload your file and click Remove Background. Once the background is gone, you can add a new background color or layer the graphic with other design elements.
7. Pattern creator
The pattern tool lets you cover the entire product surface with a repeating design. This feature is available for all-over-print products, shoes, drinkware, and tech accessories.
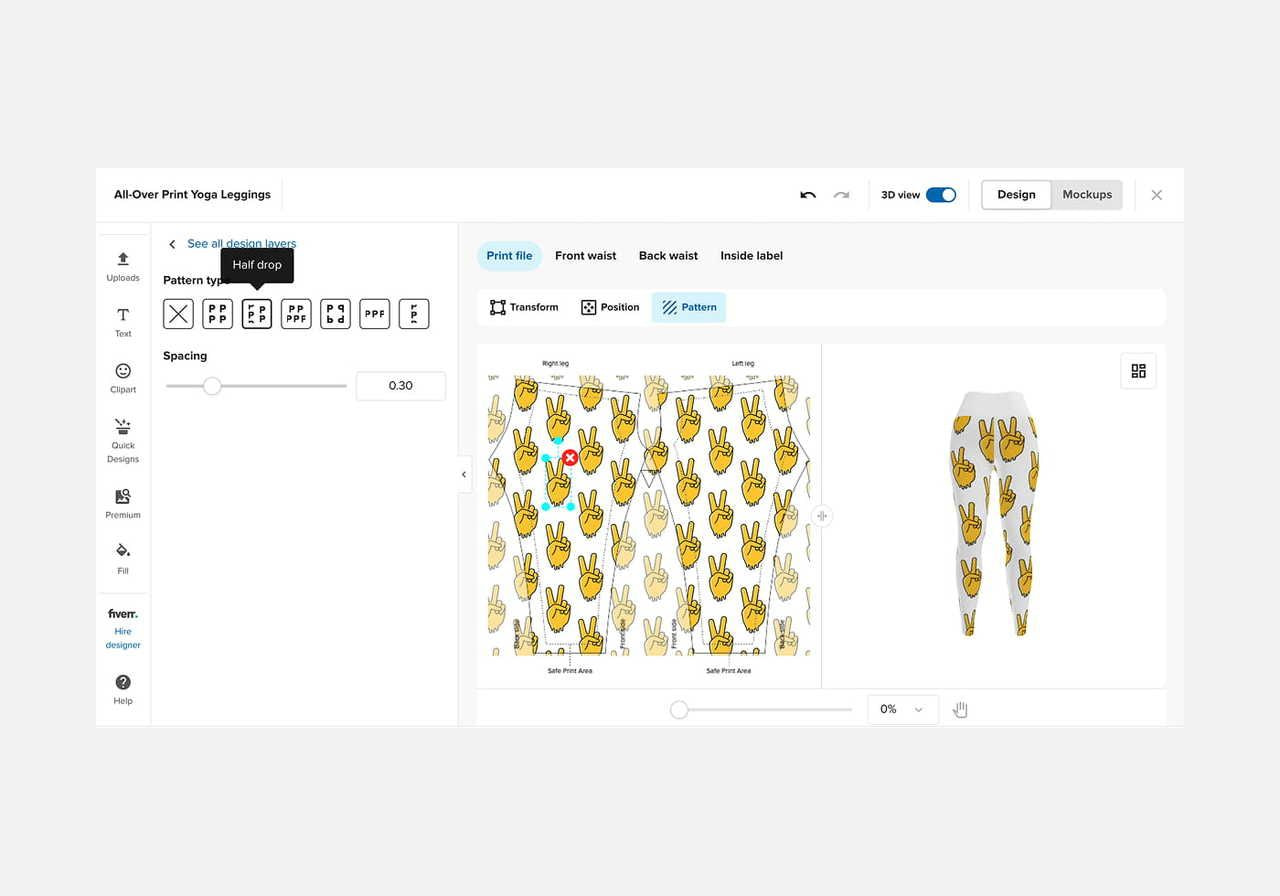
How to use the pattern tool:
-
Select a product and upload a design file or use clipart.
-
Click Pattern.
-
Choose a pattern type: half drop, block, brick, reflect, or horizontal/vertical line.
-
Adjust the color, size, and spacing of the component to modify the entire pattern.
-
Click Transform to flip or rotate the design.
You can also add more design layers or pick a background color to complete the look.
8. Design element duplication
Use the duplication tool to create designs with similar elements by placing each duplicated item in a new layer. Unlike the pattern tool, this allows you to adjust the size, color, and alignment of each layer separately.
How to use the duplication tool:
-
Upload a design element or pick one from the library.
-
Click Duplicate.
-
Arrange the items to create your design.

9. Life-like mockups
The Printful mockup generator lets you create realistic images of your designs. Preview your design in the Design Maker by clicking Mockups in the top-right corner.
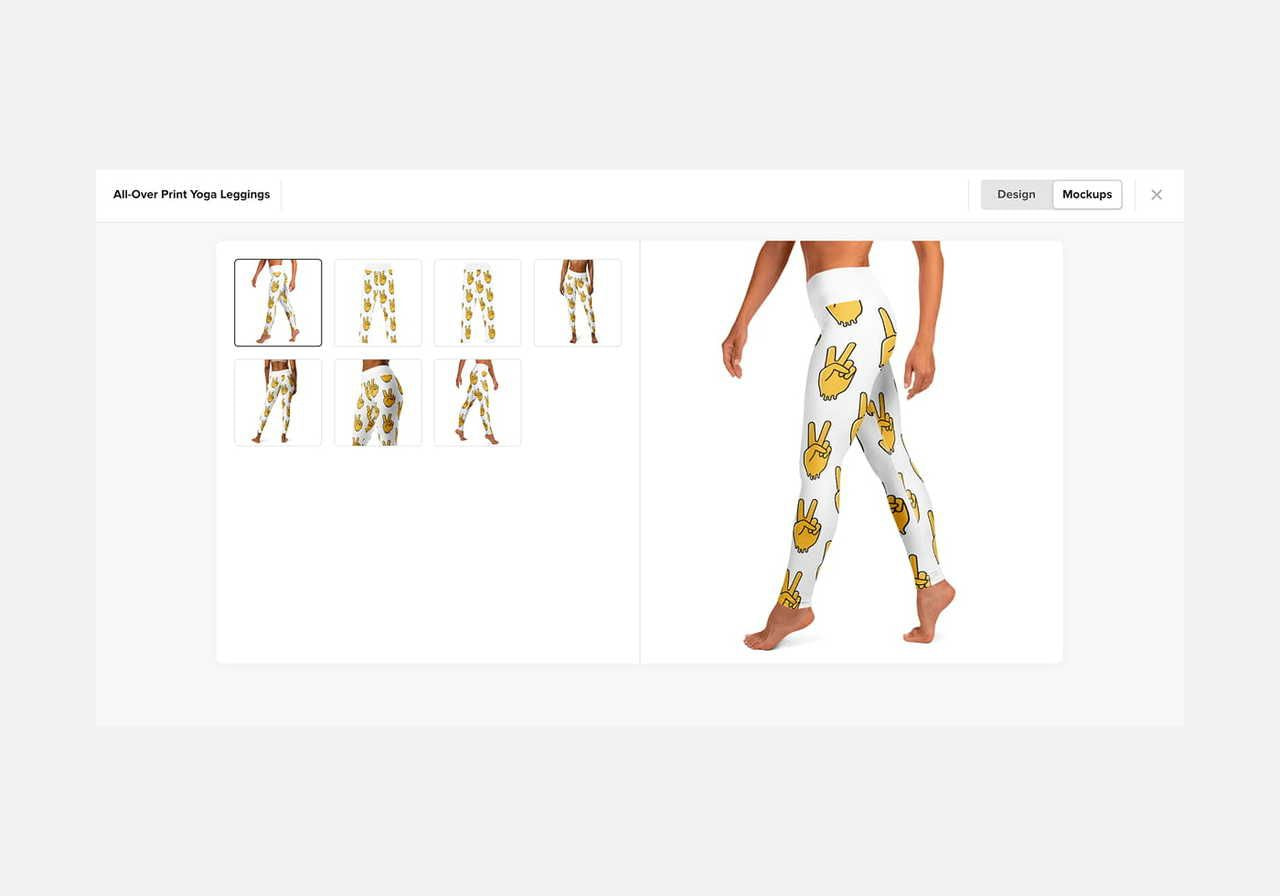
You can also generate and download these images to use on your online store. This eliminates the need for physical inventory or professional photoshoots.
How to download mockups:
-
Go to the Product Templates tab in the Printful Dashboard.
-
Hover over a product and click on the three dots in the top right corner.
-
Click Download mockups.
-
Choose the mockup style (basic or custom).
-
Download the files.
10. Multiple design applications
When you create a design for one item, you can apply it to other products in the Catalog. This is useful for maintaining brand consistency across a clothing line.
You will find a product suggestion section in the Design Maker sidebar.
If you see a product you want to put your design on, hover over it and click Add and edit. Alternatively, click Add product and choose any item from the Catalog. The design will be applied automatically.
From there, you can reposition the design, change background colors, or add more graphics.
See what others have created with the Design Maker
The design options in the tool support a ton of brand styles. Here’s how merchants use these features for their stores.
Kristy Messler-Hunt, HEART and SOULace:
“I created this design solely using Printful’s Design Maker tool. I love working with Printful because of its user-friendly interface. It’s easy to add products directly to my Etsy shop.”

Source: HEART and SOULace
Ciprian Petre, Tee Gift:
“A little creativity might lead to some unexpected results. This design was made only with Printful’s Design Maker – very easy to use and provides realistic mockups so you’ll know how your product will turn out.”

Source: Tee Gift
Kathy Kayhour, Crimson+Clover:
“The Printful Design Maker is so easy to use. I was able to design a fun, festive holiday look for my shop in minutes.”

Source: Crimson+Clover
Start a print-on-demand business with Printful
To begin building your print-on-demand brand with Printful, follow these steps:
-
Create your account: Sign up on the Printful website and connect your online store.
-
Choose your products: Select from 529 items in the Catalog, including custom t-shirts, hats, and home decor.
-
Use the Design Maker: Upload your file or use the built-in text tool and clipart to create something new.
-
List in your store: Add the products to your storefront with professional mockups and descriptions.
-
Start selling: Printful handles the production and shipping as orders come in.
Tip: Get inspiration for new t-shirt design ideas on our blog.
Time to design your next bestseller
The Design Maker’s drag-and-drop interface makes it easy to bring your creative ideas to life. Add text, clipart, and premium images to your projects, customize your designs with background colors and patterns, and download mockups to see how they would look in real life. If you’re looking for ready-to-use graphics, you can download typography assets below to help you get started.
Read next: How to Design a Logo for Embroidery: 7 Essential Things to Note
FAQ
The Design Maker includes a Text Tool for typography, a Pattern tool for all-over prints, and a Background removal tool for cleaning up images.
It also functions as a mockup generator, letting you preview products in real life. These features help you customize products and create professional, eye-catching designs. It’s the best way to avoid expensive external software.
To use the mockup generator, open your design in the Design Maker and click Mockups.
You can also download high-resolution images from the Product Templates tab in your Dashboard. These life-like images are free to use and let you display products on your online store without conducting physical photo shoots.

Published author, scholar, and musician, Andris draws on over 11 years of experience in and outside academia to make complex topics accessible – from SEO and website building to AI and monetizing art. Devoted to his family and self-confessed introvert, he loves creating things, playing musical instruments, and walking around forests.